Showing posts with label Brushed Brass Butterflies. Show all posts

Saturday, May 27, 2023

Paper Napkin Card!

 Paper Napkin Card!

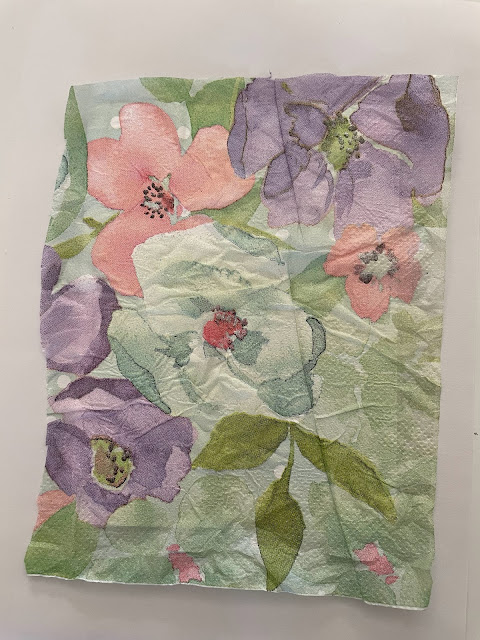
Paper napkins are not just for cleaning your face anymore! You can also make gorgeous cards with them!

I taught this technique to some new stampers today, they will never look at a paper napkin in the same way! 

The Dollar Stores in my area have a great selection of paper napkins.

Directions:

Cut a Gorgeous Grape Card Stock Base to 8 1/2" x 5 1/2", score at 4 1/4".

Cut 2 pieces of Basic White C/S: 1 @ 4" x 5 1/4" and 1@ 4 1/8" x 5 3/8".

Remove all the white backing from the paper napkin until you are left with just the patterned layer. 


Cut the paper napkin a bit larger that the 4" x 5 1/4" Basic White C/S layer. Scrunch the napkin up in your hand. Gently un-scrunch and flatten it out. 


Lay down a scrap piece of paper onto your work surface. Using a "glue stick" (like you used in school), completely cover the Basic White C/S layer with glue. Then lay your napkin, right side facing out onto the card stock and gently smooth it out. 


Turn this layer over. Using Multi-Purpose Liquid Glue or Stampin' Seal, glue the excess of the napkin to the back of the layer. 

Then attach this layer to the slightly larger Basic White C/S layer.


Attach these layers to the card base using Dimensionals.

Stamp a sentiment using Gorgeous Grape Ink onto some Basic White C/S and punch out with the 2" Circle Punch.

Punch out a Vellum Decorative Circle. Attach the sentiment circle to the Vellum using Dimensionals. Then attach it to the card front.


Add a Gorgeous Grape Sheer Ribbon Bow and some cute Brushed Brass Butterflies to finish off the card. 


A few of the supplies I have used are retired so use what you have on hand. 


I hope I have helped you to look at paper napkins in a whole different way!

If you need any supplies from Stampin' Up! please reach out and I can help you place an order or help you decide what you need.

If you place a $60 or more order with me I will send you one of these cards! Valid until June 30, 2023.

Happy Stamping and Creating!

Arlene

Product List

Thursday, February 24, 2022

Daffodil Afternoon 3 Panel Card

 Daffodil Afternoon 3 Panel Card

I can hardly wait until Spring! I thought I would hurry it along with this pretty Spring Daffodil card. The best part is this Daffodil Afternoon Designer Series Paper can be earned for free during Sale-A-Bration until Feb. 28th, 2022! Check out the SAB Catalogue on the right side of this Blog.


Directions:
Cut a piece of Pear Pizzazz Card Stock to 4 1/4" x 11" and score at 5 1/2".

Cut a piece of the Daffodil Afternoon Designer Series Paper to 4" x 5 1/4" and attach to the card front.

Cut 3 pieces of Daffodil Afternoon DSP:
 1@ 1 3/4" x 4 3/4", 
1@ 1 3/4" x  1 3/4"
1@ 1 3/4" x 2 3/4"

Cut 3 pieces of Daffodil Delight Card Stock:
1@ 1 7/8" 4 7/8"
  1@ 1 7/8" x 1 7/8"
   1@ 1 7/8" x 2 7/8"

Attach the DSP pieces together with the co-ordinating card stock pieces using Multi-Purpose Liquid Glue.

Emboss these 3 panels using the Tasteful Textiles Embossing Folder. Attach them to the card using Dimensionals. 

*Tip: Watch the direction of the Designer Series Paper so you don't have flowers upside down! Also do a dry fit before attaching the panels to get your spacing even.

Stamp a sentiment using the Flowing Flowers Stamp Set onto a piece of Basic White C/S with Memento Black Ink. Attach a small strip of Daffodil Delight C/S under the sentiment. Attach to the card front using Dimensionals. 

Add a Brushed Brass Butterfly to the tag. I also used a Daffodil Delight Stampin' Blends to colour the Basic White Bakers Twine. After it dried I tied it into a double bow and attached it to the card using a Glue Dot.


I wanted to use another piece of the DSP inside the card. I felt this piece was fairly busy so I added a Stitched So Sweetly Rectangle Die using Basic White C/S to soften the DSP. I really like how it looks!

I also made another card using the same DSP package, card stocks and layout but a different front layer piece of the DSP and a Basic White Bakers Twine double bow.


This is such a great sentiment!


Same layout, same Designer Series Paper, same card stocks but a different look!
I hope you have some time to play today!

Happy Stamping and Creating!
Arlene


Product List
Paper Snips
[103579]
$13.50

Monday, February 7, 2022

Tulip Fields

 Tulip Fields

Stampin' Up! you have done it again! The Tulip Fields Bundle is amazing!! I'm having so much fun designing cards with this stamp set and matching dies!

For todays card I stamped the rows of tulips then I added the windmill, some shrubs, a tree, clouds and the adorable little fence.


Directions:

Cut a piece of Granny Apple Green Card Stock for your card base, 8 1/2" x 5 1/2" and scored at 4 1/4".

Cut a piece of Basic White C/S to 4" x 5 1/4".

Stamp the floral "horizon" first approximately 1/3 down the Basic White layer using Calypso Coral Ink.

Next stamp the center row using Mango Melody Ink. Leave slight spaces between each stamped row. The stamps are Photopolymer so you can see through them. If you stand up to do this part it's much easier to line up the rows with even-ish spacing. 

Then on each side of the middle, stamp the next rows (2) using Flirty Flamingo Ink. 

Lastly stamp the last 2 rows beside the Flirty Flaming rows using Daffodil Delight Ink. 

Using a scrap piece of paper or post-it-notes, cover up your stamped floral rows and lightly add some Balmy Blue Ink to the sky using a Blending Brush. *Tip: ink up the Blending Brush then remove some ink onto a scrap piece of paper. Add the ink to the C/S using a soft circular motion. Continue adding ink until you are happy with the results. 

Stamp some shrubs along the "horizon" using Pear Pizzazz Ink.

Stamp a tree using Pear Pizzazz Ink onto Basic White C/S. Die cut it out with the coordinating die and attach it to the card on the horizon, using Multi-purpose Liquid Glue.

Stamp some clouds using Balmy Blue Ink onto Basic White C/S.  Die cut them out and attach to the card using Multi-Purpose Liquid Glue.

Die cut 1 long and 1 short fence using Crumb Cake Ink. Attach them to the card using multi-Purpose Liquid Glue. 

Stamp a Windmill in Soft Suede Ink onto Basic White C/S and die cut. Attach it to the card using Mini Dimensionals. 


Stamp a sentiment using Memento Black Ink onto Basic White C/S.  Punch it out using the Double Oval Punch. Punch out a scalloped oval using Flirty Flamingo C/S. Attach together then attach to the card using Dimensionals. 

Add a Brushed Brass Butterfly to the oval and a double White Bakers Twine bow. 

For the inside of the card I simply stamped the windmill in Soft Suede Ink and the shrubs in Pear Pizzazz Ink onto a 4" x 5 1/4" piece of Basic White C/S.


If you have any questions or comments I love hearing from you! I hope I have inspired you today! Happy Stamping and Creating! 

Arlene 


Product List
Paper Snips
[103579]
$13.50