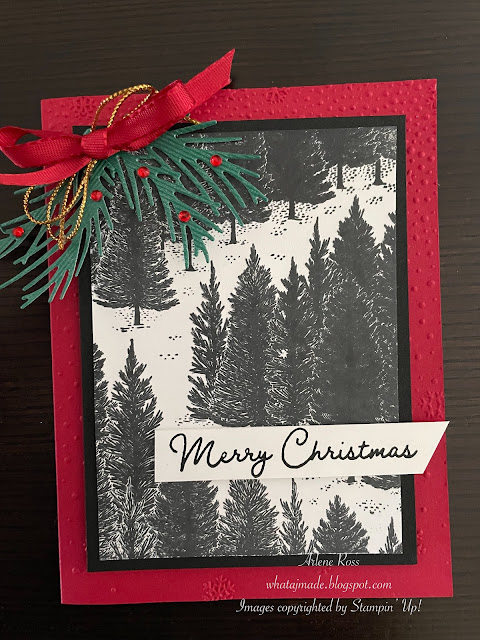
Fragrant Forest Christmas Card
I just love how this card came together. The black, red and white are so striking together.
This was one of the cards we made at my Card Club/Class this weekend. We meet once a month, I design, prepare and supply everything to make the cards.

After I finished designing this card I decided to change it up a little. Here is version 2.

Then I decided to add a sentiment strip to the card front.
Which one do you like better?
Directions: Cut a piece of Real Red Card Stock to 8 1/2" x 5 1/2" and score at 4 1/4".
Emboss the front using the Snowflake Sky 3D Embossing Folder from Stampin' Up!
Stamp the trees from the Fragrant Forest Stamp Set using Memento Black Ink onto a piece of 3 1/4" x 4 1/2" Basic White C/S. *Tip: I used a Misti Stamp Positioner so I could ink up and stamp the trees a few times so they would be very dark.
Attach this layer to a 4 3/4" x 3 1/2" piece of Basic Black C/S.
Attach these layers to the card front using Dimensionals.
I sprayed the card front at this point with a mixture of rubbing alcohol and some shimmer paint or a few drops from a Wink Of Stella Brush to add some soft sparkle. Tip *Using a spray bottle with a fine mist, add a few drop of a sparkly paint, add some rubbing alcohol and spray your project then dry with a Heat Tool.

You can see the fine shimmer here.
Die cut 2 boughs from the Noel Dies using either the White or Green from the Textured 12 x 12 Shimmer Paper.
Attach the boughs to the card using Glue Dots.
Cut a piece of Gold or Silver Cord from the Simply Elegant Trim. Loop the cord back and forth a few time, use Glue Dots to hold it and attach it to the top of the boughs with more Glue Dots.
Attach a bow over top of the looped cord using Glue Dots. One of the card uses the Black And White Gingham Ribbon and the other uses the Real Red Ribbon. I tried to off-set it slightly from the cord.

Color some Rhinestones with a red sharpie marker and attach to the boughs.

Card Inside: For the card inside, cut a 3 1/2" x 5" piece of Basic White C/S.
Using the "Noel" Die from the Joy Of Noel Bundle, die cut the word "Noel" out from the above layer. Use something like Washi Tape or Post-It-Note Tape to center the die so it doesn't move. Be sure to keep the center of the "O". Glue this layer inside of the card, add the inside of the "O". Now the Real Red Card Stock will show through! Super easy way to make the inside of the card impressive!!


I hope you have enjoyed todays cards and the variations. Hopefully I have inspired you 💜
Happy Stamping and Creating!
Arlene
Here is the list of products that I have used to make todays cards. If you need anything and live in Canada here is my link to shop in my store.
Thanks so much!
Product List ") |  | ||
 | |||
 |  |  |  |
 |  |  |  |
 |  |  |  |
")
")
 Shimmer Paper")

 Gingham Ribbon")


")
 Designer Series Paper")
 Circle Punch")


 Wavy Trim")
 Textured Ribbon")
