Monday, November 28, 2022

New Post: Fun Fold

 Gate Fold Snowflakes Fun-Fold Card

Hello and welcome to my Blog! I have a pretty fun-fold to share with you today. It's really easy too!


Directions:

Cut a 5 1/2" x 8 1/2" piece of Pool Party Card Stock for your card base. Score this piece at 2 1/8" on each long end to create the "gate" fold. 

Cut 2 pieces of the Snowflake Specialty Vellum to 1 7/8" x 5 1/4" and attach to the 2 front flaps. *Tip: add your adhesive to the back of the vellum where there is the white flocking so it doesn't show. 

Cut a 4" x 5 1/4" piece of Basic White C/S and using Pool Party Ink, stamp some snowflakes onto the bottom right corner from the Peaceful Deer Stamp Set.

Die cut 2 Glimmer snowflakes, set one aside. Using a GlueDot attach one overtop of the stamped snowflakes then attach this panel inside your card. 


Using the Scalloped Contours Dies, die cut one Basic White C/S rectangle and one small Pool Party C/S rectangle. Layer these together and using a few Dimensionals on the LEFT side only of these rectangles, attach to the card front.

Tie a piece of the Iridescent Trim onto the left side of the card.

Attach a Wonderful Snowflake to the centre of the Pool Party rectangle using a GlueDot. Attach the second Glimmer snowflake over top using a GlueDot. 

Die cut a Basic White C/S banner from the Celebration Tags Dies and stamp a sentiment using Memento Black Ink. Attach the banner overtop of the snowflakes using a GlueDot.

Add a few Iridescent Pearls to finish off the card!

This is such a great fun fold to use up all the bits and pieces we have of Designer Series Paper. The possibilities are endless!!

My inspiration for todays card came from Ronda Wade! Thanks Ronda!!!

Some of the products I have used today are on the retiring list!! So if you need/want/must have them don't wait!! When they are gone, they are gone!! These include the Wonderful Snowflakes, Celebrate With Tags Bundle, Dies and Stamp Set and the Snowflake Specialty Vellum.

If you would like to place an order with me for any of the supplies I have used, just click on any of the photos below or go to my on-line store on the right hand side of my Blog.

Thanks for stopping by today!

Happy Stamping and Creating!

Arlene


Products List:

Paper Snips
[103579]
$15.00

Wednesday, November 23, 2022

Blog Hop: Birthday Cards

Welcome to another Blog Hop with Canada Ink's Up!!


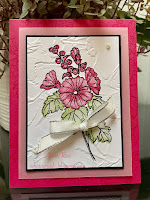
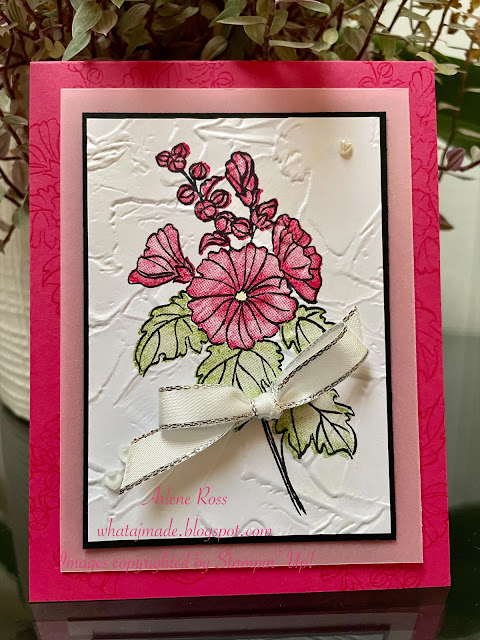
This month we needed to design a birthday card for our blog hop. I decided to use a new stamp set that will be a free offering in the January 2023 Sale-A-Bration Catalogue!! So here is your Sneak Peek of the "Beautifully Happy Stamp Set".


Isn't that a beautiful floral image!! It's a two-step stamp set and so pretty!! The set contains 17 images to stamp and lots of sentiments too!


I used the Framed Florets Dies to create a frame around the inside sentiment.


Directions:

Cut a piece of Melon Mambo Card Stock to 4 1/4" x 11" and score at 5 1/2".

Using Melon Mambo Ink, stamp the floral image from Beautifully Happy all over the card front. The tone on tone effect is very pretty.

Attach a 3 5/8" x 4 7/8" piece of Vellum Card Stock to the card front using Dimensionals. *Tip: attach the Dimensionals more to the center of this panel so the next layer will cover over them. 

On a piece of Basic White C/S cut to 3" x 4 1/4", stamp the floral image using Memento Black Ink. Using the 2-step stamping method add Melon Mambo and Pear Pizzaz Inks to the flowers and leaves. Emboss this panel using the Painted Texture 3D Embossing Folder. Attach this panel to a piece of Basic Black C/S cut to 3 1/8" 4 3/8". Attach over the Vellum layer. 

Add Wink Of Stella to the flowers. 

Add a Silver Metallic Bow and some Heart Pearls.

For the inside: 

Cut a piece of Basic White C/S to 5 1/4" x 4".

Stamp a small Melon Mambo flower in the corner.

Stamp the sentiment using Memento Black Ink directly onto this Basic White layer.

Die cut a Melon Mambo C/S frame using the small oval from the Framed Florets Dies. You only need the outer frame, save the middle oval for another project. Glue this around the sentiment. I love how it gives it a popped up look. 

Add three Rhinestones to the sentiment. 

I hope you liked todays card! Leave me a comment, I love hearing from you.

Be sure to hop around and see all the great projects from our team!

Happy Stamping and Creating!

Arlene

Blog Roll


Product List
Heart Pearls
[159190]
$11.00
Paper Snips
[103579]
$15.00

Tuesday, November 15, 2022

Seasonal Sale!!

 Stampin' Up! Seasonal Sale!


Create more by spending less during the Seasonal Sale! Between 15 and 18 November 2022, select products from the 2022–2023 Annual Catalog will be on sale with the following discounts:

  • 10% off all punches
  • 15% of all stamps (Host stamp sets are not included in this sale)
  • 20% off all dies
  • 20% off all embossing folders
  • 20% off all non-specialty and non-assortment Designer Series Paper

With the season of giving upon us, this is a great opportunity to buy gifts for your fellow crafting enthusiasts, or to stock up on supplies for all your upcoming handmade projects. Remember, this sale is for four days only! Don’t miss out!


Shop Seasonal Sale here!

Happy Stamping and Creating!

Arlene


Wednesday, November 2, 2022

New Release, Fitting Florets

 New Release, Fitting Florets!

There is so much to love about this new collection! First off those amazing dies, and the Designer Series Paper is stunning! I love that they included a Christmas greetings stamp set along with the all occasion stamp set. 


I decided to use the stamp set and dies to make a Christmas card along with a few other supplies. Everything will be listed at the bottom of this post. 


Directions:
Cut a piece of Thick Basic White Card Stock to 4 1/4" x 11" and score at 5 1/2".

Cut another piece of Basic White C/S to 4" x 5 1/4". Stamp a sentiment in the bottom right corner using Memento Black Ink.
Cut a strip of the Boughs Of Holly Designer Series Paper to 3/4" x 5 1/4" and glue it to the left side of the layer. Attach this layer to the card base. I used Multi-Purpose Liquid Glue but you could also use Dimensionals to attach this layer to the card base.

Using Basic White C/S die cut a Framed Oval. You will end up with 2 pieces, the frame and the inside oval. Look at that detail on the frame!! Emboss the inside oval using the Timber 3D Embossing Folder. Glue the oval to the card layer. Using Mini Dimensionals, attach the frame over the oval. 


Stamp the floral image using Memento Black Ink onto Basic White C/S and colour in with Stampin' Blends. Add some Wink Of Stella all over the flowers then attach it inside the oval using Dimensionals. 

Add a Silver Simply Elegant Trim bow to finish it off! 

I just love how this card turned out! Leave me a comment, I love to hear from you!


Check out the video here!


You can purchase the whole collection, the bundle or a stamp set. 

The following exclusive products are only available until January 4, 2023 while supplies last. Order now so you don't miss out!

  • Framed & Festive Cling Stamp Set (item 160888)
  • Fitting Florets Designer Series Paper (item 161814)
  • Gold Adhesive-Backed Swirls (item 161822)
*My Blog is best viewed using the Web version. Scroll to the bottom of the post for that option.*

Happy Stamping and Creating!
Arlene

Product List
Paper Snips
[103579]
$15.00