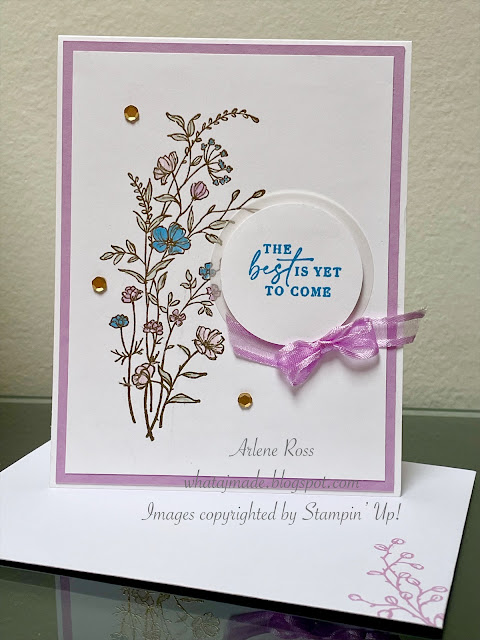
Paper Napkin Card!
Paper napkins are not just for cleaning your face anymore! You can also make gorgeous cards with them!
I taught this technique to some new stampers today, they will never look at a paper napkin in the same way!
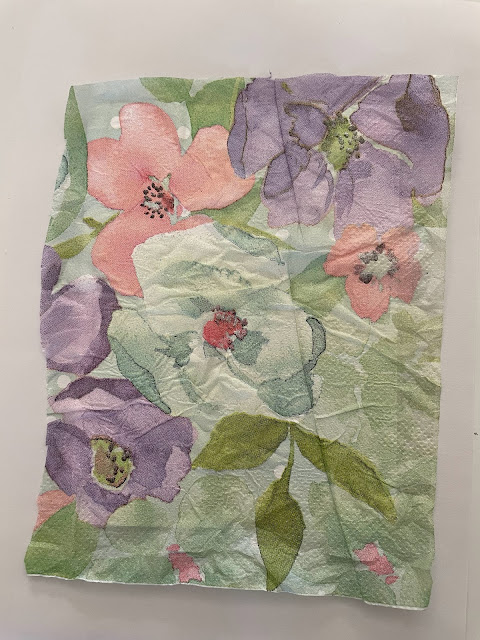
The Dollar Stores in my area have a great selection of paper napkins.
Directions:
Cut a Gorgeous Grape Card Stock Base to 8 1/2" x 5 1/2", score at 4 1/4".
Cut 2 pieces of Basic White C/S: 1 @ 4" x 5 1/4" and 1@ 4 1/8" x 5 3/8".
Remove all the white backing from the paper napkin until you are left with just the patterned layer.
Cut the paper napkin a bit larger that the 4" x 5 1/4" Basic White C/S layer. Scrunch the napkin up in your hand. Gently un-scrunch and flatten it out.
Lay down a scrap piece of paper onto your work surface. Using a "glue stick" (like you used in school), completely cover the Basic White C/S layer with glue. Then lay your napkin, right side facing out onto the card stock and gently smooth it out.
Turn this layer over. Using Multi-Purpose Liquid Glue or Stampin' Seal, glue the excess of the napkin to the back of the layer. Then attach this layer to the slightly larger Basic White C/S layer.
Attach these layers to the card base using Dimensionals.Stamp a sentiment using Gorgeous Grape Ink onto some Basic White C/S and punch out with the 2" Circle Punch.
Punch out a Vellum Decorative Circle. Attach the sentiment circle to the Vellum using Dimensionals. Then attach it to the card front.
Add a Gorgeous Grape Sheer Ribbon Bow and some cute Brushed Brass Butterflies to finish off the card.
A few of the supplies I have used are retired so use what you have on hand.
I hope I have helped you to look at paper napkins in a whole different way!If you need any supplies from Stampin' Up! please reach out and I can help you place an order or help you decide what you need.
If you place a $60 or more order with me I will send you one of these cards! Valid until June 30, 2023.
Happy Stamping and Creating!
Arlene
Product List

 Designer Series Paper")
 Designer Series Paper")
 Designer Series Paper")
 Designer Series Paper")
 Designer Series Paper")
 Designer Series Paper")
 Designer Series Paper")
 Designer Series Paper")
 Designer Series Paper")
 Designer Series Paper")
 Designer Series Paper")
 Designer Series Paper")
 Designer Series Paper")

")

 Circle Punch")
 Circle Punch")


")


 Open Weave Ribbon")


")


 Gorgeous Grape Sheer Ribbon")

