Friday, February 21, 2025

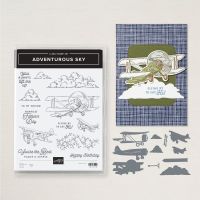
Floating Hexagon Adventurous Sky Card

Floating Hexagon Adventurous Sky Card 

This is such a great fun fold! I had a lot of fun designing this card with the Adventurous Sky Bundle. 


There are lots of samples and videos on-line showing how to create this fun fold. 

Here are my directions:

Cut Thick Basic White Card Stock to 5 3/4" x 5 3/4" score both ends at 1 1/2". Fold both ends into a valley fold. This is the card base.

Cut 2 pieces of Thick Basic White C/S to 6 3/4" x 1 1/2". Score both at 1/2", 2 1/2", 4 1/4" and 6 1/4". Fold all score lines into mountain folds. These are the struts.

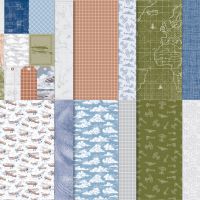
Cut 2 pieces of the Take To The Sky Designer Series Paper to 5 1/4" x 1" and 2 pieces of Basic Black C/S to 5 1/2" x 1 1/4". Attach the DSP to the card stock layers and attach to both sides of the card base.

Cut 1 piece of DSP to 5 1/4" x 2 1/4" and 1 piece of Basic Black C/S to 5 1/2" x 2 1/2", attach the DSP to the C/S and attach to the center of the card base.

Cut 4 pieces of DSP to 1 1/2" x 1" and Basic Black C/S to 1 3/4" x 1 1/4", attach together and adhere to the corners sections of the struts.

Cut 2 pieces of DSP to 1 1/4" x 1" and 2 pieces of Basic Black C/S to 1 1/2" x 1 1/4", attach together and adhere to the middle sections of the struts.

Add some adhesive to the left side tab of one strut and lining it up with the top edge of the card base, glue it to the back of the card base. Do this to the second strut on the bottom left lining it up with the bottom edge. ONLY attach the struts on the left side at this time. See photo.


Cut 3 pieces of Window Sheet: 2 at 5 1/2" x 1/2" and 1 at 5 1/2" x 5/8". Using Glue Dots, attach the wider Window Sheet to the inside of the center section of the strut and the other 2 to each side of the struts on the sides. See photo. This is where your planes and clouds attach to so they appear to be "floating".


Attach the right sides of the 2 struts to the back of the card base completing the "hexagon" shape.

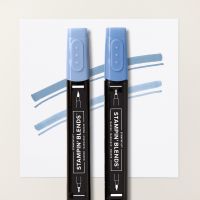
Stamp 1 big airplane and 2 small airplanes using Memento Black Ink onto Basic White C/S. Die cut and colour using Stampin' Blends. 


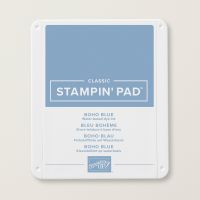
Stamp the clouds in Boho Blue Ink onto Basic White C/S then die cut or fussy cut. (I found it faster to fussy cut them).

Using Glue Dots, attach the 3 airplanes to the Window Sheets. 


Attach the clouds to the Window Sheets and to the inside of the card. I used Dimensionals on the inside clouds. I attached the inside clouds last so I could position them so they wouldn't be blocked by view from the planes. 

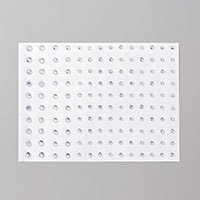
Die cut a Silver Foil propeller and attach it to the big airplane. I then added a Black Matte Dot or a Rhinestone coloured with a black Sharpie Marker to the center of the propeller.

I added some Wink Of Stella to the clouds.

Stamp the sentiment using Memento Black Ink onto Basic White C/S, flag trim one end and attach to a slightly larger piece of Poppy Parade C/S. Attach to the bottom middle section using Dimensionals. 

You can add your message to the back of the card base.

I hope you can find some time to try out this fun fold!

Have you heard about Stampin' Up's Sale-A-Bration promotion? It's a great time to place an order because you can earn FREE products!! There is only 6 days left of this yearly promotion! Check out the brochure below.

Sale-A-Bration 2025

Stampin' Up! has also added a few more items available to earn for FREE!

Sale-A-Bration additional items.

In other news, Stampin' Up! has added some New Kits to their Kit Collections
.

So Much To Celebrate Kit $20.00
DETAILS
- Makes 9 cards: 3 each of 3 designs
- 2 folded card sizes
- 4-1/4" x 5-1/2" (10.5 x 14.9 cm): 6 cards
- 6" x 3" (15.2 x 7.6 cm): 3 cards
- Sentiments printed in Dutch, English, French, and German
- Colours: Balmy Blue, Old Olive, Pecan Pie, Petal Pink, Pumpkin Pie

Kit includes one of each item listed below.
- Step-by-step instructions
- 9 printed envelopes
- Puffy stickers
- Gold foil
- Adhesive
- A 9-7/8" x 6-1/2" x 2-3/4" (25.1 x 16.5 x 7 cm) printed box for storage or crafting on the go
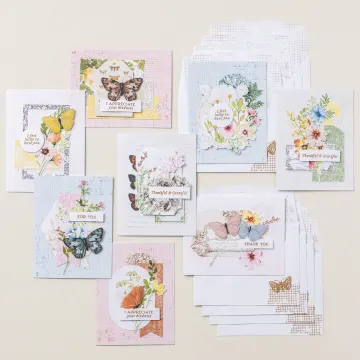


How stunning is this Kit!!
Heirloom Arrangements Kit $32.00

Do you love the convenience of crafting with an all-inclusive kit but wish it offered a little more wiggle room for creativity? Then the Heirloom Arrangements Kit is perfect for you! With detailed vintage designs, eight card options, and loosely choreographed instructions, you can let your creativity shine and still have everything you need for your projects right at your fingertips.

DETAILS
- Makes 8 cards: 1 each of 8 designs
- Folded card size: 4-1/4" x 5-1/2" (10.5 x 14.9 cm)
- Colours: Basic Black, Blueberry Bushel, Cajun Craze, Cherry Cobbler, Crumb Cake, Daffodil Delight, Garden Green, Old Olive, Pecan Pie, Pretty in Pink, Pretty Peacock
- Also available in French

Kit includes one of each item listed below.
- Heirloom Arrangements Photopolymer Stamp Set
- Clear stamp block
- Pecan Pie Classic Stampin’ Spot
- Basic instructions
- 8 printed envelopes
- Precut elements
- Specialty vellum
- Adhesive
- A 9-7/8" x 6-1/2" x 2-3/4" (25.1 x 16.5 x 7 cm) printed box for storage or crafting on the go

Happy Stamping and Creating!

Arlene


Product List

Friday, January 31, 2025

Fun Fold Easel Card & Lola's Birthday!

 Fun Fold Easel Card

I love making easy fun folds and this one is very easy! I used the gorgeous Floral Delight Designer Series Paper again, it is just so pretty!!


Directions: 

Start with a piece of Pool Party Card Stock cut to 5 1/2" x 8 1/2" and score it at 4 1/4".

Open up the card, place it in your Stampin' Up! Trimmer and cut on the long side at 1 3/8" up to the score line, repeat of the other side. * See photo.

   
                                                                   𑁋𑁋𑁋 Score   ⎯⎯⎯ Cut                                                                     

On the middle section only, score at 2 1/8". Mountain fold it.

Attach a 3" x 4 1/8" piece of Basic White C/S to the inside then glue down both of the flaps.

Attach a 1 1/4" x 4 1/8" piece of the Floral Delight DSP to each flap.

Cut a 2 1/2" x 4" piece of Basic White C/S (I used a Radiating Stitches Die for mine).

Stamp a Pool Party Ink heart onto this layer using the Free Sale-A-Bration set "Heart Shaped".


See how you can earn this set for FREE! ⤵


Using the Free Heart Shaped Dies, die cut a Daffodil Delight C/S heart and attach it over top of the stamped heart.

Attach this layer to the middle pop up adding glue to only on the bottom section.


Die cut 2 Pool Party C/S hearts, 1 Daffodil Delight Heart and 4 Soft Sea Foam leaves, all from the Heart Shaped Die Set.

Die cut a Basic White label and stamp "thank you" in Pecan Pie Ink. Attach to the card over top of the heart.

Attach the flowers using Dimensionals and 2 of the leaves using Multi-Purpose Liquid Glue.

Stamp the trio of flowers in Pool Party Ink and die cut. Attach them using Dimensionals to the inside of the card about 2/3 of the way down, this acts as the stopper for the middle portion of the card so it will stand up. Attach the 2 remaining leaves using glue.

I also coloured all my flowers with some Wink Of Stella. Add some Rhinestone Gems to finish it off!

The card folds flat for mailing!


I hope you have enjoyed todays card and I hope I have inspired you to try this fun fold!

Today is a very special day, our Miss Lola Bean turns 14 today!!! 🎂

How time flies!!! 


                                  Here she is last winter in the snow!! She is not 

                                 a fan of the snow! We have to dig a path for her. 

                                                 Such a sweet pup!

                                               Happy birthday Lola!!


Happy Stamping and Creating!

Arlene


Friday, January 24, 2025

Beautiful Wishes Card

 Beautiful Wishes Card

Have you seen the new Delightful Wishes Suite Collection in the January-April 2025 Stampin' Up! Catalogue? It is stunning!! I have always loved Pool Party and Daffodil Delight together, it's so soft and Springy!


I also love that the word "wishes" can be die cut and those bees, adorable!!

Check it out here.

Here is my card.


The card is a regular A2 card, 8 1/2" x 5 1/2" scored in half at 4 1/4". 
I added a 4" x 5 1/4" layer of Pool Party Card Stock that was embossed with the StarStruck Embossing Folder. You can earn this embossing folder for FREE during Sale-A-Bration 2025! 

Check out the SAB catalogue for all the details!

Sale-A-Bration 2025

Cut a 3 1/2" x 4 1/2" piece of Basic White C/C and stamp the branch in Pecan Pie the flowers in Daffodil Delight and Lemon Lolly and leaves in Old Olive. Then tear off about a 1/2". 

Attach this layer to the Pool Party layer. I also splattered it with Wink Of Stella.

Stamp "wishing" in Pool Party onto Basic White C/S and Die cut. Attach to the card.

Stamp and die cut the sentiment using Pecan Pie Ink. Attach with Dimensionals. 

Add a small Daffodil Delight bow and a Bumblebee Trinket. 

Isn't this such a happy card!


For the inside I stamped the flower again and I added a thin strip of the Floral Delight Designer Series Paper with a small strip of Pecan Pie Card Stock behind it. 


Finding time in my craft room is always so rewarding! I hope you find some time to play and create too!

Happy Stamping and Creating!
Arlene


Wednesday, January 8, 2025

It's Time To Sale-A-Brate!!!

 It's Time To Sale-A-Brate!

 Stampin' Up! is starting off the New Year with a big bang! This week, they've released a whole host of exciting new products.

  • New online-exclusive items
  • New scrapbook brochure items
  • New mini catalog products
  • Sale-A-Bration items
  • Three brand-new kits!

The best part? All these items are now available for purchase, and every purchase counts toward earning free Sale-A-Bration rewards! I love FREE stuff!!

Check it all out HERE!

January to April 2025 Mini

January to April 2025 Mini Catalogue

Sale-A-Bration 2025

Sale-A-Bration 2025 Catalogue


Sale-A-Bration is one of our biggest promotions of the year!!! I always look so forward to seeing what Stampin' Up! has to offer for FREE!! Check out the catalogue above! For every $75.00 you spend you qualify for a FREE Sale-A-Bration item!! You can shop from any of the Catalogues or the On-Line Exclusives! Spend $150.00 and you can pick an even bigger Free item!! 


Scrapbooking Brochure

Here is a look at our Scrapbooking Brochure. It is filled with gorgeous Designer Series Papers and so much more!


Check out our Kits Collections! 

Kits are a great way to start your stamping experience, make quick cards or get your mojo happening! 

I hope you find some time to relax and check out all our promotions and new catalogues. Please reach out to me if you have any questions, I'm always here to help!

Happy Stamping and Creating!
Arlene


Sunday, December 22, 2024

Reindeer Fun Card and Miss Lola with Santa!

 Reindeer Fun Card and Miss Lola with Santa

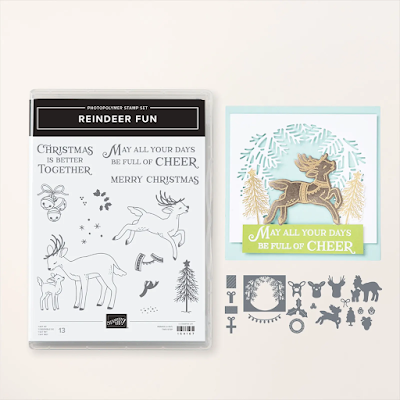
Todays card features the adorable Reindeer Fun Bundle from Stampin' Up!


 It also coordinates perfectly with the Reindeer Days Designer Series Paper! It's on sale too!


Directions:

Cut a card base of Thick Basic White Card Stock to 8 1/2" x 5 1/2" and score in half.

Cut a piece of Real Red C/S to 3 3/4" x 5 1/4" and attach to the card base.

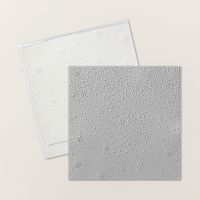
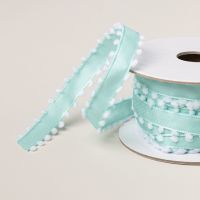
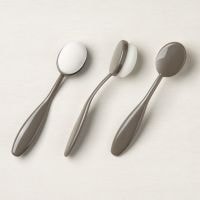
Cut a piece of Basic White C/S to 3 1/2" x 5", Using a Blending Brush and some Pool Party Ink, add a light layer of ink to the center of this layer. Then emboss with the Snowflake Sky Embossing Folder. Wrap some Pool Party Pompom ribbon around this layer and tie into a knot on the left hand side. Attach this layer using Dimensionals to the Real Red C/S layer.

Stamp the sentiment in Early Espresso Ink onto a 3 3/4" x 1" piece of Basic White C/S. Flag cut the end and attach using Dimensionals.


Die cut or punch out a Pool Party C/S circle and a smaller Basic White C/S circle. Use any circle dies or punches that you have. Attach the pool Party C/S circle using Dimensionals to the card front, then attach the Basic White C/S circle over top. 

Die cut the deer pieces: 

The antlers are Early Espresso C/S, the inside ears are Basic White C/S and top Layer is Pean Pie C/S.                                                     

Attach all the pieces together using Multi-Purpose Liquid Glue.


Die cut a wreath from Shaded Spruce C/S. Glue behind the deer. Die cut a Real Red C/S bow and attach to the wreath. Attach the deer/wreath to the circle using Dimensionals. 

Add some Rhinestones to the wreath that have been colored using a red Sharpie Marker or a Real Red Stampin' Blends.

For the inside of the card and the envelope I stamped a Shaded Spruce Ink tree. 

I hope you find some time for yourself during the holidays. It can be stressful at times, so it's important to take some breaks for yourself. I love to go into my craft room and play or even just tidy and organize. I could spend hours organizing my room!!! 

Miss Lola has been soooooo good this year that she decided she wanted to visit Santa so she could brag, I mean tell him how good she has been. So we drove her out to see him. Santa already knew she has been a good girl so it was no surprise to him, but he still sat patiently while she filled him in on all her goodness! He also wished her an early happy 14th birthday, she was so excited that he remembered! Lola even got to see other doggies and kittys at Santas place,  apparently she wasn't the only good girl. She was so excited and happy that she was doing helicopter tail wags! Of course she got a treat from Santa, another highlight of her visit. Way to go Lola! We are very proud of you and love you very much!


Merry Christmas everyone!!

Love and Hugs,

Arlene and Lola Bean!


Product List
Paper Snips
[103579]
$16.50