Showing posts with label Petal Pink Ink. Show all posts

Thursday, June 29, 2023

New Post From WhatAJMade

 Sneak Peek Of Translucent Florals


I have been playing around again with the Translucent Florals Stamp Set. It will be available in the September-December 2023 Mini Catalogue. As a Stampin' Up! Demonstrator we get to see and purchase the new products ahead of time! It's a great perk!!


For this card I didn't even use the matching dies, I fussy cut out the flower and leaves. I also used the new Delightfully Eclectic Designer Series Paper. Have you seen it? It's on page 129 of the 2023-2024 Annual Catalogue. It contains 48 sheets! I love the different assortment of colours and patterns.


Directions:

Cut a piece of Berry Burst Card Stock to 8 1/2" x 5 1/2" and score at 4 1/4" and 2 1/8". Fold back the 2 1/8" right side onto itself to create the Z fold. Fold and burnish.

Cut a piece of the Delightfully Eclectic DSP to 5 1/2" x 2 1/8" and attach to the front flap. 

Cut a piece of Basic White C/S to 3" x 4 1/4". 

On a scrap piece of Basic White C/S, stamp the flower 2 times using Petal Pink Ink and the leave stalk 2 times using Soft Sea Foam Ink. Cut out the 2 flowers and the leaf stalks. Then cut out two single leaves from one of the leaf stalks.

On the Basic White C/S panel, glue down one leaf stalk. Using  Dimensionals, attach the 2 flowers together, then attach on top of the leaf stalk. Add the 2 separate leaves over top of the glued down leaves using Dimensionals. 

Attach this layer to a 3 1/4" x 4 1/2" piece of Basic Black C/S.

Add Dimensionals to only the left side of these layers and attach to the card front.

Stamp "Happy Birthday" using Memento Black Ink onto some Basic White C/S. Add a thin strip of Basic Black C/S under the sentiment strip. Then add Dimensionals to the sentiment and then tuck it under the flower and attach.

Add some Tinsel Gems to the card front and centre of the flower. 

For the inside of the card, cut a 4" x 5 1/4" piece of Basic White C/S. Using the leaf stamp, ink it up in Soft Sea Foam, stamp off once onto scrap paper then stamp in the middle of the inside layer. Ink up the sentiment using Memento Black Ink and stamp it over top of the leaf. 

I also added a 1/2" x 5 1/2" strip of the same DSP as the card front to the inside. 

That's it! A fun and easy Z fold card!

Happy Stamping and Creating!

Arlene

To shop any of the products that I have used today, simply click on the pictures below and you will be directed to my on-line Stampin' Up! Store. Thank you for stopping by today!

Product List
Paper Snips
[103579]
$15.00

Sunday, June 18, 2023

Artistically Inked For Freshly Made Sketches


Artistically Inked Thank You Card

Hello and welcome to another Freshly made Sketch Challenge Card. I love joining this sketch challenge, it's helps me with my creativity!

Be sure to check out all the other cards here at Freshly Made Sketches!

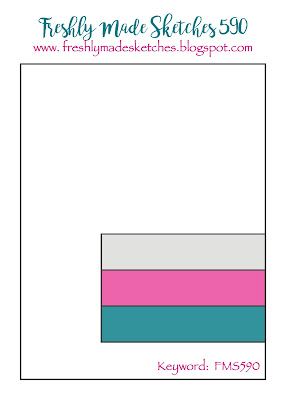
This is the sketch layout that we followed this week.


Here is my interpretation of the sketch! 


This card is very simple to make, it is only using stamps, inks and papers. You don't need any fancy tools to re-create this card. 


Directions:

Cut a Petal Pink Card Stock base to 5 1/2" x 8 1/2" and score in half at 4 1/4".

Cut a piece of Basic Black C/S to 4 1/8" x 5 3/8" and attach to the card base using Multi-Purpose Liquid Glue.

Cut a piece of Basic White C/S to 4" x 5 1/4".

Stamp the large flower using Petal Pink Ink onto the Basic White C/S layer.

Stamp the leaves using Soft Sea Foam Ink.

Stamp the flower center using Daffodil Delight Ink.

Stamp "thanks" 3 times over top of the flower using Memento Black Ink.

Attach this panel to the card base using Multi-Purpose Liquid Glue.


For the inside I did the same stamping as I did for the card front.


I stamped the front of the envelope using the same stamp pads but I used the smaller flower from the stamp set. No naked envelopes!! 

                                           That's it!!!! Easy right!

I love hearing from you, please leave me a comment!

Shop with me HERE! I appreciate all orders :) Like this card? Place an order of $50.00 or more and I will send you this card! 

Happy Stamping and Creating!

Arlene

Product List

Monday, August 17, 2020

Pink Peony

Pink Peony


It's time for another Freshly Made Sketches Challange! Check it out here:

Freshly Made Sketches


I kept my design very simple and clean!!


The card base is Petal Pink with a layer of Whisper White C/S: 3 3/4" x 5 1/4" embossed with Tasteful Textiles Embossing Folder. Cut this panel on the diagonal and add strips of Smokey Slate on the inside edge. Glue down a piece of Peony Garden Designer Series Paper to the card base on a diagonal so it will show when the 2 diagonal pieces are added. Attach the 2 diagonal panels to the card base using dimensionals. Cut out a small Stitched Nested Label using Whisper White C/S and one size up using Smoky Slate C/S. Stamp sentiment onto the Whisper White label using Basic Grey Ink and a Peony Flower using Petal Pink Ink. Attach to card front using Dimensionals. That's it!! Easy peasy!!


Hope you liked todays card!!

Happy Stamping and Creating!
Arlene

Product List

Basic Black Archival Stampin’ Pad
[140931]
$9.25

Tuesday, August 4, 2020

Gorgeous Posies

Gorgeous Posies Project Kit

I have always loved Project Kits! When I saw this one, in my favorite colour purple, I knew I was getting it ASAP!!! For me a kit is really great when my creativity has decided to take a break! They are fun, easy and all the instructions are included. 

It also comes in a beautiful keepsake BOX!
You can buy the kit and stamp set or just the kit or just the stamp set. I bought both because I really liked the Box and the sentiments included with the stamp set. 
Buy the Project Kit Here: