Friday, May 19, 2023

(New Post) Seaside Bay Sympathy Card

 Seaside Bay Sympathy Card

I made this card using the Seaside Bay Bundle from Stampin' Up! It is a quick and easy card to make.


If you didn't need a sympathy card you can easily change the sentiment. This set also has a lovely thank you sentiment. 

Directions:

Cut a 8 1/2" x 5 1/2" piece of Thick Basic White Card Stock and score at 4 1/4".

Cut a Misty Moonlight C/S strip to 3/4" x 5 1/2" and emboss using the Basics 3D Embossing Folder. This set has 3 different embossing folders. Any one of them would be great to use!

Attach this piece to the card base on the right side.

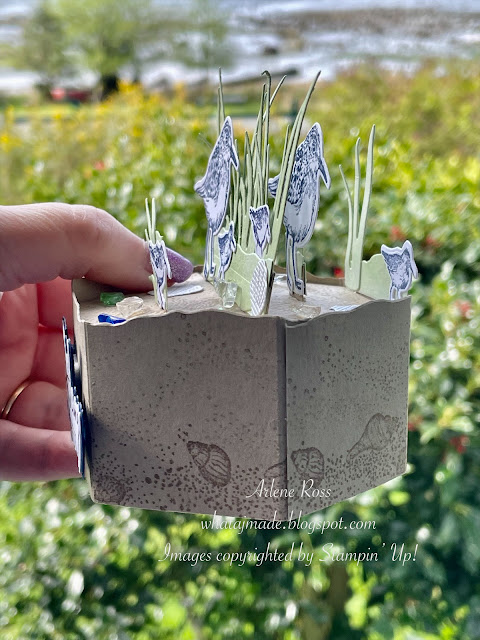
Cut another piece of Thick Basic White C/S to 3 3/4" x 5". Using the Stampin' Up! Blending Brushes, add some Pecan Pie Ink to the bottom portion of the layer. 

*Tip- I rub the brush into the ink pad then I rub most of it off onto a piece of scrap paper, then I add the ink to the layer. I use soft circular motions. Once I feel like there is not too much ink left on the brush I push down a little bit harder. Re-ink and repeat until you are happy with the results. This way you avoid harsh lines. It's better to start light and add more ink as you go along. 

After you have finished with the sand, using the same Pecan Pie Ink, stamp the shells a few times along the bottom. **I stamped off one time for a softer look. Repeat this using the sand stamp.

Using Misty Moonlight Ink, use the same technique as above and add ink for the sky.

Stamp 2 small birds using Misty Moonlight Ink. *Tip- I only used the one little bird, (the stamp has 3) stamping it two times. 

On a scrap piece of Basic White C/S stamp the big bird in Misty Moonlight Ink. Die cut out and attach it to the layer using a few Dimensionals. 

Punch out or die cut a 2 1/4" circle from Vellum Card Stock. Using Misty Moonlight Ink, stamp the sentiment and a small bird. Set aside to dry for a few hours or use a Heat Tool to dry it. Attach it to the layer with a few teeny tiny dots of Multi-Purpose Liquid Glue. *Tip- after adding the glue I use my finger tip to smooth out the glue.

Add some Rhinestones to the Vellum circle.

Attach this layer to the card base using Dimensionals.


I hope I have inspired you today. Thanks for stopping by!


Happy Stamping and Creating!

Arlene


Product List

Thursday, May 11, 2023

(New Post) Sketch Challenge!

 Freshly Made Sketches #585

Oh boy! This was a difficult one for me! 


I really struggled putting together something that I liked following this layout. My trash bin was full!! 

So, I decided to do some score lines! I love it! It is soft and subtle yet so effective. I forget that adding score lines is sometimes all that you need to add some interest to a card!

Be sure to check out all the other cards that the Freshly Made Sketches participants designed HERE. So much talent!

Now, onto my card.

I used the returning Blueberry Bushel Card Stock for my card base and the flower. I'm so happy that it made a return to Stampin' Up's color family!

Directions:

Cut a Blueberry Bushel C/S base to 5 1/2" x 8 1/2" and score at 4 1/4".

Cut a 4" x 5 1/4" piece of Basic White C/S.

Score this Basic White layer at:

3/8", 1/2", 5/8"

1 1/8", 1 1/4", 1 3/8"

1 7/8", 2", 2 1/8 

2 5/8", 2 3/4", 2 7/8"

3 3/8, 3 1/2" and 3 5/8"

Attach this layer to the card base.

Die cut 2 Basic Black C/S leaf sprigs. Attach to the card using Multi-Purpose Liquid Glue.


Stamp the sentiment onto a Basic White C/S strip using Memento Black Ink. Angle cut both ends and attach using Dimensionals. 

Die cut 3 Blueberry Bushel C/S flowers. Layer together using  Mini Dimensionals. Attach to the sentiment strip using glue.

Add a Flat Backed Adhesive Pearl to the center of the flower. 


For the inside, I stamped some sprigs using Blueberry Bushel Ink.


It is a simple card but I just love how it turned out.....finally!!

Happy Stamping and Creating!

Arlene

Product List
Paper Snips
[103579]
$15.00

Sunday, May 7, 2023

(New Post) Platform Pop-Up Hexagon Card

 Platform Pop-up Hexagon Card

This was a really fun card to make. I saw this amazing blog post from Kim and she has a very detailed tutorial for this fun fold! 

See her post here: Horsin' Around Stamping. 

Here is my card. I'm giving it to my Mom for Mother's Day. 

I took these photos at my parents home in Sointula B.C. It makes such a beautiful background for photos.


I stamped the sand and shells in Crumb Cake Ink on Crumb Cake card Stock. The birds are stamped in Night Of Navy Ink onto Basic White Card Stock. The grasses are Soft Sea Foam Card Stock. The shells were die cut using the White Textured Shimmer Paper. I love the shimmer of this paper, just like a real shell!

This fun fold card folds flat and fits easily into an A2 envelope. 


That beautiful Sea Glass (Beach Glass) is some of what I have found on the beaches in Sointula! Beach combing is one of our favorite activities to do while visiting Sointula! 


Here are some more pics from beautiful Sointula.


I hope you find some time soon to check out Kims Tutorial and make one of these cards for yourself! 

Happy Stamping and Creating!

Arlene


Product List
Paper Snips
[103579]
$15.00