Easy Easel Shaker Card!
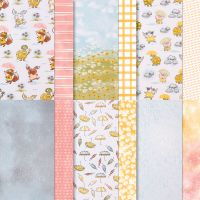
How adorably cute is the Rain Or Shine Specialty Designer Series Paper!! The matching Playing In The Rain Bundle is also super adorable! Note, this collection is out of stock until Mid March. It was very popular!
Have you ever seen a shaker card made with a Stampin' Up! Clear Medium Envelope before? I have made many and they are so easy and quick to make up.
This one is a Easel Shaker card! Doesn't that turtle look so happy and sweet.


Directions:
Cut a piece of the Rain Or Shine DSP to 4" x 5 1/4". *Tip: I cut my DSP so I would have some sky and some flowers. Don't worry, you will use some of the leftover.
Add a tiny dot of adhesive to the back of this DSP piece and slip into the Clear Envelope. Push it right to the bottom and to one side. The dot of adhesive will hold it in place once you have it in position.
Add the For Everything Fancy Sequins. Careful not to get it under the DSP or to the side without the DSP. Once you have enough bling, seal the top of the envelope tightly at the back. Without disrupting the sequins too much, turn the envelope over (backside) and add Tear And Tape to the side of the envelope with the gap. Seal it tightly to the DSP edge. This will contain all the sequins. You have just created your shaker card!!
 |
Add Tear And Tape down the long side. |
 |
Remove Tear And Tape backing and seal tightly against the DSP. |

Now it's time to decorate!
I die cut a bridge using the Playing In The Rain Dies from Thick Basic White Card Stock.
I die cut 2 Calypso Coral C/S butterflies and a bow tie.
I stamped the turtle onto Basic White C/S using Memento Black Ink and coloured him in using Stampin' Blends. I used Old Olive, Daffodil Delight and Calypso Coral. Die cut him out.
I added Wink Of Stella to the flowers, butterflies and bow tie.
Attach the bridge with some Stampin' Seal or Glue Dots on each end. Attach the turtle and butterflies with some Dimensionals.

Attach the art panel to a 4 1/4" x 5 1/2" piece of Thick Basic White C/S for some added strength. Set aside.
Cut a piece of Balmy Blue C/S to 4 1/4" x 11", score at 4 1/4" and 8 1/2". You are creating a "tent" with a little panel out front. A tent with a front porch!

When you fold it up it will fit into a regular sized A2 envelope.

Using a piece of the leftover DSP that has the flowers on it, cut it down to 4" x 2 3/8". Attach to the shorter inside section of the card base. See photos for placement.

Add adhesive to the outside larger flap of the card base and attach the art panel. It will stick up above the card base.

Cut a piece of Basic White C/S to 3" x 3/4". Stamp the sentiment using Tahitian Tide Ink. *Tip: I wanted my sentiment to be one long greeting so I inked up each word separately, stamped it, cleaned the stamp very well, inked up the next word, stamped it, clean the stamp very well etc.
Attach this layer to a piece of Tahitian Tide C/S that measures 3 1/8" x 7/8". Attach this to the bottom area of the inside that has the short piece of DSP using Dimensionals. This is your "stopper" that will hold up the card front for displaying! Add a few Rhinestones to the sentiment strip.

For the card inside, I cut a 4" x 4" piece of Basic White C/S and stamped the turtle in Tahitian Tide Ink.
If you don't already have a Canadian Stampin' Up! Demonstrator I would love to help you out! Please reach out and contact me. Thank you!
Happy Stamping and Creating!
Arlene
Product List
 |  | ||
 |  |  | |
 |  | ||
 |  |  | |
 |  |  |  |
 Designer Series Paper")
")


")
")

 Shimmer Paper")
 Designer Series Paper")


