Showing posts with label Garden Green Ink. Show all posts

Friday, May 5, 2023

(New Post) A Little Bird Told Me......

 A Little Bird Told Me.......

How adorable is this little blue bird! Can you spot the two new Stampin' Up! colors that I used?


Directions:

Cut the So Saffron Card Stock to 5 1/2" x 8 1/2" score at 4 1/4".

Cut a piece of Basic White C/S to 4" x 5 1/4" and stamp 2 branches using Early Espresso Ink, the leaves using Garden Green Ink and the flowers using Berry Burst Ink. 

Emboss this panel using the Basics 3D Embossing Folder.

Attach this panel to the card base.

 On a scrap piece of Basic White C/S, stamp the bird and wing using Azure Afternoon Ink, the beak using Daffodil Delight Ink. Add the eyes using Memento Black Ink. Punch out using the coordinating Bird Punch.

Attach the birds wing using Dimensionals and the beak using a dot of glue.
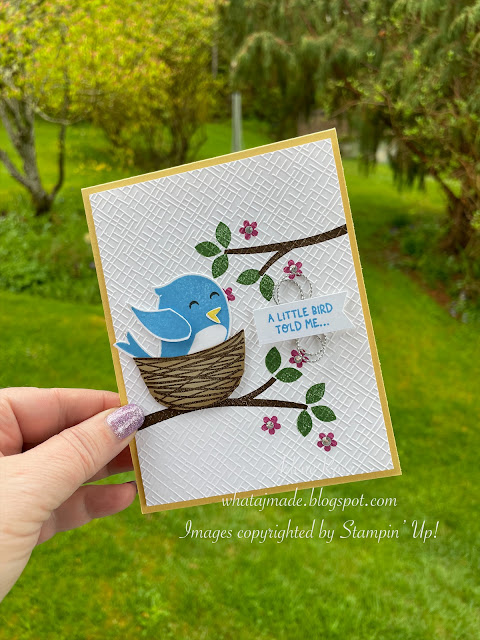

Using a scrap of Crumb Cake C/S and Early Espresso Ink, stamp a nest. Take a Blending Brush and add some Crumb cake Ink to the edges of the nest. 

Attach the nest using Dimensionals to the branch.

Add some Multi-Purpose Liquid Glue to the back of the bird and tuck the bird into the nest. 

Add a small bit of Stampin' Seal Adhesive to the card and add a few loops of Silver Thread into the glue.

Stamp the sentiment using Azure Afternoon Ink onto a small strip of Basic White C/S. Flag cut one end. Attach over top of the Silver Thread using Dimensionals.


Add some Rhinestones to the center of the flowers.

The two new colors that I used are Azure Afternoon for the bird and Berry Burst for the flowers. 

For the inside I stamped the sentiment using Azure Afternoon Ink and the flowers in Berry Burst Ink. 


I hope you have enjoyed todays card!

Happy Stamping and Creating!

Arlene

🛍 Shop with me here.

Thank you!

Product List

Paper Snips
[103579]
$15.00

Sunday, January 1, 2023

Happy New Year!!


Happy New Year!!

I wish everyone a happy and healthy 2023. Thank you for following along on my Blog and sending me comments! I love hearing from you.

I have a sneak peak card for you today. It's the adorable "Thanks A Bunch" Stamp Set that will be one of the free Sale-A-Bration offerings starting January 5th, 2023.


 Who knew carrots could be so cute!! 

I started with a piece of Thick Basic White Card Stock, 8 1/2" x 5 1/2" scored in half at 4 1/4".

Cut a piece of the New "Dandy Designs Designer Series Paper" to 4" x 5 1/4" and attach it to the card base. This DSP is another free Sale-A-Bration offering! It has 48 double sided sheets!

Cut a piece of Vellum to 4 5/8" x 3 5/8" and attach over the DSP layer. *Tip: add adhesive to the Vellum where it will be covered by the art panel so the adhesive doesn't show through.

Cut a piece of Basic White C/S to 3" x 4". Stamp the carrots in 2nd generation Pumpkin Pie Ink. What does 2nd generation mean?? Ink up the carrot stamp, stamp off once onto scrap paper then stamp onto the C/S. This gives you a lighter colour. Stamp the carrot detail stamp in full strength Pumpkin Pie Ink. Stamp the carrot tops in Garden Green Ink. Stamp 3 more carrot tops onto scrap paper, fussy cut and attach over the stamped carrot tops using Dimensionals.  

Cut a piece of Crumb Cake C/S to 3 1/8" x 4 1/8" and layer the art panel onto this.

Wrap some Crumb Cake Essentials Bakers Twine around this panel 2x's and tie a bow onto the right side. Attach this layer to the card base using Dimensionals.

Stamp "Thanks" and "a bunch" onto Basic White C/S using Memento Black ink. Cut apart and attach to the card using Dimensionals.

Add a Bumblebee Trinket or whatever you have on hand to finish off the card.

I hope you have enjoyed todays card!

Happy Stamping and Creating!

Arlene