Showing posts with label Friendly Hello Bundle. Show all posts

Sunday, February 27, 2022

Pop-Up Tulips Fields Card

 Pop-Up Tulip Fields Card

I made another 3 panel card layout but with a surprise "pop-up" inside! I really like how the Rich Razzleberry Card Stock pairs with the So Saffron Card Stock. And the Flowering Fields Designer Series Paper is stunning!!


Here is the surprise "pop-up" inside.


Card Front Directions:

Cut a piece of Rich Razzleberry C/S to 4 1/4" x 11" and score at 5 1/2".

Cut another piece of Rich Razzleberry C/S to 4" x 5 1/4" and emboss using the Gingham Embossing Folder. Attach it to the card front.

Cut 3 pieces of So Saffron C/S to:

1@ 1 7/8" x 4 7/8"

1@ 1 7/8" x 1 7/8"

1@ 1 7/8" x 2 7/8"

Cut 3 pieces of the Flowering Fields DSP to:

1@ 1 3/4" x 4 3/4"

1@ 1 3/4" x 1 3/4"

1@ 1 3/4" x 2 3/4"

Attach the DSP strips to the So Saffron C/S strips using Multi-Purpose Liquid Glue. Attach the 3 panels to the card using Dimensionals. 

**Tip: Watch the direction of the Designer Series Paper when you cut it so the flowers are in the correct orientation. 

On a small scrap of So Saffron C/S stamp a sentiment using Memento Black Ink. Flag cut one end. Attach a few loops of Linen Thread behind the sentiment strip using a Glue Dot then attach it to the card front using Dimensionals.

Inside Pop-Up Directions:

Cut piece of Rich Razzleberry C/S to 5" x 3". With the 5" side against the top of the trimmer, score at 1/2", 2 1/2" and 4 1/2". Fold and burnish.

Cut a piece of Flowering Fields DSP to 2 3/4" x 1 3/4". Watch the direction of the pattern. *See photos. Also cut a piece of So Saffron C/S to 2 3/4" x 1 3/4". 

Line up the center fold of this pop-up piece with the card base fold, centering it on the right and left as well. 

Add some Multi-Purpose Liquid Glue to one of the tabs, fold the tab over so it will attach to the card base. Hold in place and gently fold the card closed so that the tab attaches and adheres and the centres stay aligned. 


Repeat on the other tab.


Gently pull up the center fold so that it pops outwards.


Attach the 2 3/4" x 1 3/4" Flowering Fields Designer Series Paper to the bottom pop-up portion.

On the So Saffron C/S 2 3/4" x 1 3/4" piece, stamp a sentiment. Attach it to the top portion of the pop-up. 

Die cut a Sahara Sand C/S windmill body, an Early Espresso C/S windmill detailed body and blades.

Trim off 2 sections of each blade so it will fit inside the card.

Glue the detailed windmill body to the other body of the windmill. Glue the blades onto the windmill. Add a Brushed Metallic Dot to the center of the windmill blades. Attach the windmill to the pop-up piece using Multi-Purpose Liquid Glue.

You could add a Basic White C/S panel to the inside of the card before adding the pop-up feature for writing on or add a piece to the back of the card. 

I really enjoyed making this pop-up card and I hope you get a chance to make one as well.

Happy Stamping and Creating!

Arlene


Product List 

Paper Snips
[103579]
$13.50

Monday, February 21, 2022

Friendly Hello Fun Fold Card

 Friendly Hello Fun Fold Card

I had so much fun making this card! It looks difficult but it's so easy!! I saw this fun fold on Pinterest and I just had to make it!

This fun fold is called a "Double Dutch Door Card".


Directions:

Cut a piece of Pool Party Card Stock to 4 7/16" x 10". Score this piece at 6".

Cut a piece of Basic White C/S to 4 1/4" x 3 3/4" and attach to the top flap.

Cut a piece of the Friendly Hello Designer Series Paper to      4 1/8" x 3 5/8" and attach to the Basic White C/S layer on the top flap. 

Cut another piece of Pool Party C/S to 2" x 9". Score at 2 1/4" on each end. This creates the bottom door flaps. This piece will be glued to the back of the card at the very bottom, with the flaps at the front.

Cut 2 pieces of Basic White C/S to 1 3/4" x 2" and attach to the bottom flaps.

Cut 2 pieces of the DSP to 1 5/8" x 1 7/8" and attach to the Basic White C/S on the 2 flaps.

Cut a piece of Basic White C/S to 3 3/4" x 3 3/4" and a piece of the DSP to 3 1/2" x 3 1/2" and attach together. 

Attach this layer to the card on an angle using Dimensionals. I centered the point of the square to line up with the opening of the bottom flaps. **Don't attach any Dimensionals where this square hangs over. You don't want to glue your card closed! 

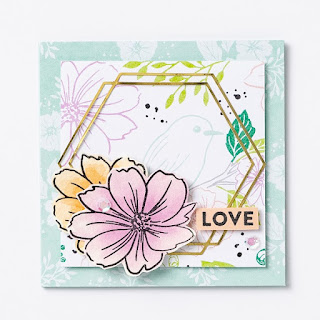
Die cut a label using the Stitched So Sweetly Dies and Basic White C/S. 

Stamp the bird with flowers onto this label using Memento Black Ink.

Colour the bird, flowers and leaves using Stampin' Blends. I used Petal Pink and Soft Sea Foam. Add some Wink Of Stella to the bird and flowers. 


Attach some Petal Pink Ribbon behind the label and attach this label to the card front using Dimensionals.

Add a few Genial Gems to finish off the card. 

The Friendly Hello Bundle can be earned for FREE until Feb. 28th, 2022 with our Sale-A-Bration promotion!

Check it out here:

Sale-A-Bration Catalogue

I hope you get a chance to try out this fun fold!

Happy Stamping and Creating!

Arlene

Product List 

Genial Gems
[155500]
$11.00
Paper Snips
[103579]
$13.50

Monday, January 10, 2022

Earn Free Sale-A-Bration Products!


 Earn Free Sale-A-Bration Products!

The following stamp sets and Designer Series Paper can be yours for free each with a $60.00 order! 


Here are some great projects designed by the amazing artists at Stampin' Up!


These two offerings are free each with a $120.00 order!! The Friendly Hello Bundle is a stamp set and Designer Series Paper!


 This beautiful Calming Camellia Stamp Set can be earned for free with a $375.00 order. This can be a individual order or a party or club order.


Calming Camellia Host Cling Stamp Set (English)
[158117]
$33.00


Check out the Sale-A-Bration Catalogue HERE!